Tuesday 31 December 2013

Scrap Around The World - Challenge #8 - December

Hello all!

Hoping everyone had a lovely Christmas and now looking forward to a wonderful year ahead.

With all the fun this time of year, I haven't had much time to scrap, however I have managed to squeeze the SATW challenge in. I'm kinda addicted to the mood boards and am loving these inspirational challenges each month. For December, the mood board was by Zaneta Glowa (Zanka) and it's just gorgeous...


I really LOVE the ring in the top right. I mean, REALLY LOVE it. However, my inspiration is from the bottom right  with the gold circle, white border and the white feather and leaves the lady is holding. I was also inspired by the colours on the bottom left.


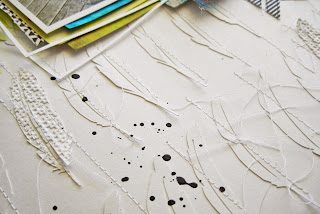
And some close-ups:


Supplies: Cardstock (American Crafts), Paper (My Mind's Eye, Basic Grey, Tilda), Die Cuts (Kaiser, Silhouette), Paint (Jo Sonja), Distress Stains, Chipboard (Wycinanka), Alphas (Basic Grey).

Thank you for coming by this busy time of year.

Wishing everyone a very Happy New Year with joy and good health.
See you in 2014!

Zeneva.

Sunday 15 December 2013

Scrap Friends - Colour Challenge #20 - DT

December is just flying past! School has broken up for the summer holidays and I just received my results for uni - I had tears of joy and relief. I now have a Bachelor of Commerce. Haven't quite got used to that yet, but I'm sure it won't take long. :-)

Mid month brings a new challenge at Scrap Friends. Colour Challenge #20 brings the gorgeous festive colours to play with:


As I have very few photos of Christmas (which I'm hoping to amend this year), I thought I'd do a layout of my sweet eldest daughter, at 7, who will be celebrating turning 8 at the end of the week.


And a few close-ups:


The guest designers and design team have all done wonderful work. Head over HERE to have a look! Hope you can join us in this challenge!

Thank you for coming by and spending a moment here during this busy time of year.

Sunday 1 December 2013

Scrap Friends - Sketch Challenge #20 - DT

And now it's December...just waiting a moment for that to sink in.

A new sketch is up at Scrap Friends. Angela consistently gives us very inspiring sketches. I just love this one:


I rotated it to look like this:


The background has many, many layers of watercolour and the die-cuts are all left overs (my Silhouette no longer has a cutter - I tried to clean it by following a tutorial then ended up breaking it - not happy!). The chipboard is from 'wycinanka'. Gorgeous chipboard I won from a SATW challenge.

Really enjoyed making this layout. I hope you find the sketch as inspiring as I did and have a go. Enter HERE - you have all month! Hope to see your layout soon!

Thank you for coming by. Hope December is crazy and fun and full of love for you all!

Saturday 30 November 2013

Scrap Around The World - Challenge #7

YAY! I have finished my last exam for uni! All being well, that means the end of my degree! Five years in the making. I am so elated. It has been hard, but worth it, I'm sure!

Anyway, to celebrate my happiness, I decided to enter the bright and apt mood board this month at Scrap Around The World, by Leonie Neal-Dawson.

Here is the mood board:


Although I liked the sketch, I decided not to use it.

For my layout, I went with the bright multi colours:


Each year for almost 3 months of the year, my children run in consecutive ages and each year I take a photo in the first week of November to document this. And for each year's layout, I seem to use circles.

The following is one of my first layouts, made in 2010, documenting photos from 2009:


Thank you for coming by and any comments you care to leave.

Tuesday 26 November 2013

Neon Colouring Tutorial

Hello all,

Thought I'd share a tutorial that I did that was up on the Scrap Friends blog last week.
It is a colouring technique I have used for two recent layouts. I have used it to colour the leaves and flowers as well as the yellow matting for my photo in the first layout, and for the waves in the second layout:


What I have done is use a highlighter pen as the base, then added extra colour over it. I find by using the highlighter pen, it gives a greater intensity of colour. If you are lucky enough to have one of the Hero Arts neon stamp pads, this will probably work as well.

Anyway, after highlighting, you can add colour using a number of different mediums. For the example I have made up a chart. In the first column, is the original highlighter colour. In the second column, I have used Distress Ink Pads then splattered with water. In the last column, I have used a variety of different mediums including Gelatos, sprays and Twinkling H2O's:


You can see in the example above,  the difference in colour that is achieved by using a different under colour highlighter. Regarding the colouring of my flowers in the first layout, I used a combination of Distress Ink Pads and Gelatos, which I smudged with a foam pad.


For the ocean, I used two different colours. Blue and green highlighters and Distress Ink Pads in Salty Ocean and Peacock Feathers (my favourite colour of all):


I used Salty Ocean along the top, which as you would expect, makes the blue highlighter colour, bluer. The Peacock Feathers gives, what I think, a better 'ocean' colour, but I really like the mix of colours. To intensify the colour further, I then added Glitter Glam. This is a liquid 'paint' that gives only a hint of colour and that has glitter added. It is applied with a brush. I have used Caspian Sea which is a gorgeous colour:


You can see above, the hint of glitter. I used my Silhouette to cut out the shape of the waves and as a highlighter, I used a white PITT artist pen. And then the waves are finished!  

Thank you for popping by.
Zeneva.

Saturday 16 November 2013

Scrap Friends - Colour Challenge #19 - DT

The colour challenge for November is now up over at Scrap Friends. It's delicious!

 The darker colours could be taken for black, or navy and really dark navy. I was going to go with the black, but changed my mind and made a totally different layout than what I had originally planned. I think I should have stuck to my original idea because I struggled a little with this one...


I hope you are able to join in with the challenge.
The Guest Designers and other Design Team members all did an awesome job. Each layout is so different. I love it! Go HERE to check it out.

Thank you for coming by and any comments you may leave.:-)

Friday 15 November 2013

Foil as an embellishment

Helloooo!
Back in September I did my first tutorial for Scrap Friends. It was using foil as an embellishment. I thought I'd show it here as well.


Here is the layout that used these foil embellishments - as the cogs:


Step 1:
  • Grab a piece of cardstock and some kitchen foil - enough to cover the cardstock.
  • In the example below, I squirted some thick glue and tried to spread it, but the best result is using a foam brush and spreading some more fluid glue, one that seals and glues is usually more flowing. 
  • As you can see in the last example, the foil with the more fluid adhesive gives a smoother finish; the thicker glue, is of course, more bumpy


Step 2:
  • Select your dies
  • Cut a piece from the foil covered cardstock to accommodate the dies. I have also punched a few circles.


Step 3:
  • Run the dies through your machine - not only does it cut out the shape, but also presses the foil and cardstock more firmly together. I use my Big Shot which I just love!
  • In the last photo, I also ran some of my circles through an embossing folder. I love this effect and it's great for punched out shapes. Try to use an embossing folder with a close-knit design.
  • Also, just be aware that the foil embellishments are rather fragile, so need a little care when handling.


Step 4:
  • When all your pieces are cut, you can experiment with adding some colour if you wish.
  • In these examples, I added some alcohol ink followed by some wax-based crayon. Water-based products will not work - you need a product with some grip.
  • The brown cog was dabbed with acrylic paint.
  • The blue cog is a little hard to see, but it was stamped with Staz-on and painted with a fluid acrylic.


Step 5:
  • With the rosettes, due to the crease, the foil started to break away a little, so I dabbed the edges with some Mod Podge (what I had at hand) - or any glue will do.
  • Then I added some Distress Stickles along the perforated edge before adding some silver glitter. I was thinking it would make a great Christmas embellishment!


Instead, I made this card:


Thank you for looking!


The new colour challenge for Scrap Friends will be released later today as well (probably late tonight or sometime tomorrow for Aussie readers).
Here's a sneak peek at my layout:


Can you guess the colour palette? Come back later to check it out!

Thank you for coming by.


Saturday 2 November 2013

Scrap Friends -Sketch Challenge #19 - DT

Hello all!,

It's hard to believe it's November already. I have been really busy with uni lately, and shall continue to be for the next month, so I apologize for not getting around and seeing all your amazing creations and commenting as much as I'd like, but I hope to catch up next month!

Anyway, the new month signals a lot of new challenges around. Scrap Friends has always been one of my favourite challenge sites and I feel so fortunate to be on their design team. Angela does AWESOME sketches and this month (Sketch #19) is no exception:


And my version:


And some close-ups:


I have used mostly the Finnley collection from Glitz, available from the store HERE.
I just LOVED this sketch. It was so much fun to play with and the Guest Designers and other Design Team members all did a fabulous job. Have a look HERE. I hope you have the time to join in as well!

Thank you for coming by and any comments you may care to leave.:-)

Sunday 20 October 2013

Scrap Around The World - October Challenge - Guest Designer

Hello! Hope you are enjoying the weekend!

I was really lucky last month to be the winner of the September challenge for SATW, so this month I had the opportunity to guest design for this month's challenge. It is by Jessy Christopher and so, so pretty:


Although the sketch is optional, I chose to base my layout on it:


As you can probably tell, I was inspired by the pretty colours and the gold from the shoes (my 7 year-old daughter who has a fetish for shoes (already!!!), wants them!).

And some close-ups:


All the paper and die-cuts are from Crate Paper 'Maggie Holmes'. The mists are all Glimmer Mists. The splash of gold, was gold paint, mixed with some glue and glitter, then splattered, adding more glitter afterwards.

It's a gorgeous challenge. All the details are HERE.

Thanks for looking!